



Custom Classifiers
Create a classifier, add or generate its labels, and choose its settings.
Overview
Create classifiers on the Classifiers page, then add or generate their labels and choose how they run. For what a classifier is and how it decides on a label, see Classifiers.
Create a Classifier
Open Classifiers
Open Classifiers, under Evals in the left navigation.
Pick a starting point
Pick a template (Add …) or Build your own to open New classifier.
Name and describe it
Give the classifier a name and description, then create it.
The classifier opens on its own page. This is where you manage its labels, settings and generation; Used in lists the workflows and collections that run it.
Where its labels come from depends on how you started:
graph TD
    A[Sentiment] --> L[Labels ready to use]
    B[Topics, Use Cases, Issues] --> G[Generate labels]
    C[Build your own] --> N[New label]
    C --> G
    G --> S[Suggested labels]
    S -->|Accept| L
    N --> L

    style A fill:#e1f5fe,color:#1e293b
    style B fill:#e1f5fe,color:#1e293b
    style C fill:#e1f5fe,color:#1e293b
    style G fill:#f3e5f5,color:#1e293b
    style N fill:#f3e5f5,color:#1e293b
    style S fill:#fff3e0,color:#1e293b
    style L fill:#e8f5e8,color:#1e293b
Add Labels
Click New label and fill in its Name, Description, Which is better? and Applies to (see Labels for what each one does).
Generate Labels
If you don't yet know what labels you need, let the classifier suggest them from your production traffic. Click Generate labels from traces (or threads): the classifier runs with Auto classify on over a sample of your recent traces, spans or threads, and each new label it proposes is added as Suggested. Use Configure generation to choose what to sample from and the sample size.
Suggested labels show Accept (✓) and Decline (✕) actions instead of the regular edit menu. Accepted labels become regular labels and start running on the next ingestion tick. Declined labels are deleted. Re-running generation while suggestions are still pending discards the old ones first.
Settings
The classifier's Settings hold three toggles:
- Enabled — turns the classifier on or off entirely
- Auto classify — when on, the classifier may propose new labels (saved as Suggested on the labels list) when none of your existing labels fit; when off, it can only pick from the labels you've already defined or return no match
- Include audio — turns it into an audio classifier (see below)
Leave Auto classify on if you want to keep discovering edge cases, and off if you want a fixed taxonomy.
Audio Classifiers
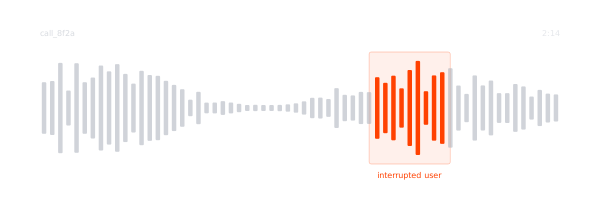
For voice agents, a classifier can listen to the call as well as read its transcript. Turn on Include audio in the classifier's settings, so labels like dead air, interruptions or audio glitches are picked from how the call actually sounded:
graph TD
    A[Call recording] --> B[Wave profile]
    A --> C[Transcript]
    A --> D[Audio model listens]
    B --> E[Classifier]
    C --> E
    D --> E
    E --> F[Label with evidence]

    style A fill:#e1f5fe,color:#1e293b
    style B fill:#f3e5f5,color:#1e293b
    style C fill:#f3e5f5,color:#1e293b
    style D fill:#f3e5f5,color:#1e293b
    style E fill:#e8f5e8,color:#1e293b
    style F fill:#e8f5e8,color:#1e293b
- Wave profile — the recording's waveform is measured for silence, dropouts, interruptions, slow responses, volume, echo, background noise, distortion, speaking speed and more.
- Transcript — what each speaker said.
- Audio model — if your project's platform model can receive audio, it listens to the clips too. If it can't, the classifier still gets the wave profile and transcript, and its settings show a warning: choose a voice model in Model Settings to let it listen to the recording.
The classifier picks a label from all three, and places the evidence for it on the call so you can see when it happened.
Cost
Each classification logs a usage event for billing. See Project Settings → Data Usage under the Signals line for live usage and projected cost.
Next Steps
Classifier Task
Run classifiers automatically on incoming traces, spans and threads.
Classifier Collections
Group classifiers so they run together.
Last updated on